NeuroData Cloud
-
Manually annotate in Fiji
-
Programmatically annotate in R
-
Manually annotate in Neuroglancer
This guide shows how to annotate data in a way that NeuroData can import into our processing pipelines.
NOTE: This guide is based on a guide written by the Nomads NeuroDataDesign team.
Annotate with FIJI
-
Install onto your system using https://imagej.net/Fiji/Downloads.
-
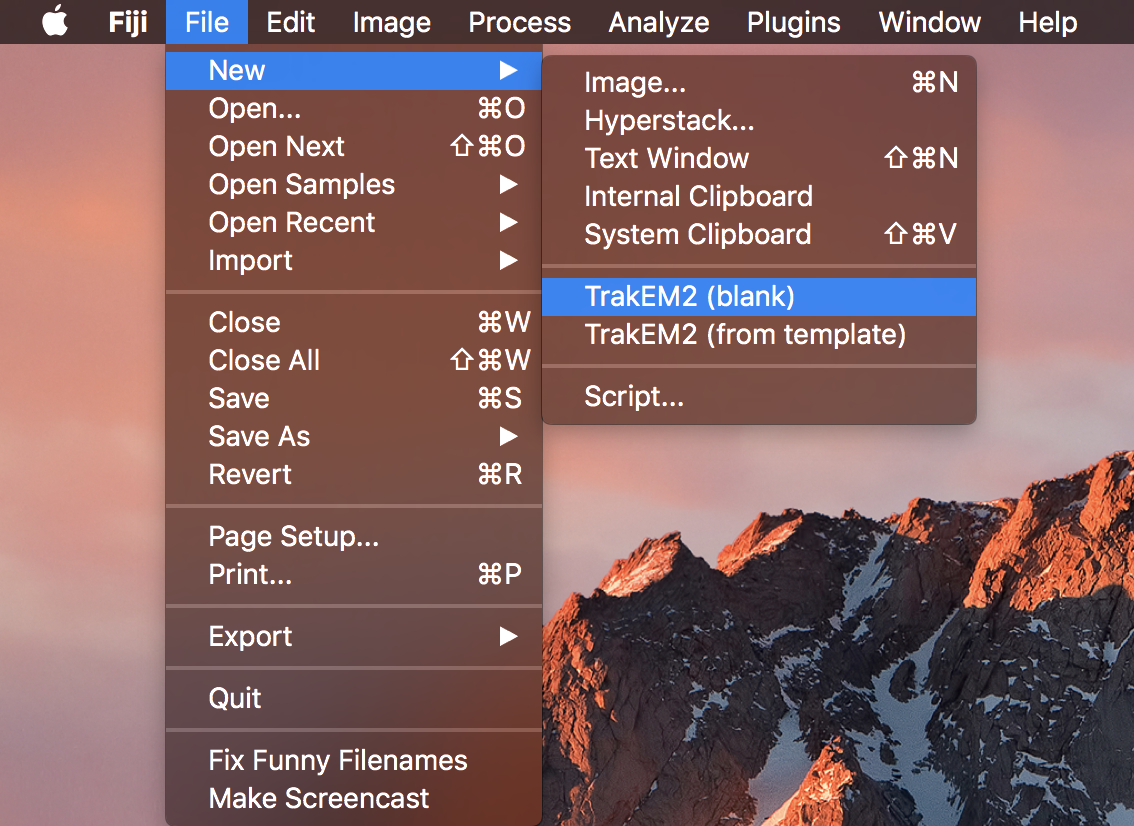
Open FIJI, and start a new blank TrakEM2.

-
Navigate to the folder of your image volume and select "open".
-
This should have changed your ImageJ canvas. Now, drag your volume from your folder into the canvas.
-
In the popup window, make sure that "Resize canvas to fit stack" is checked. After clicking OK, your canvas should snap to your image.
-
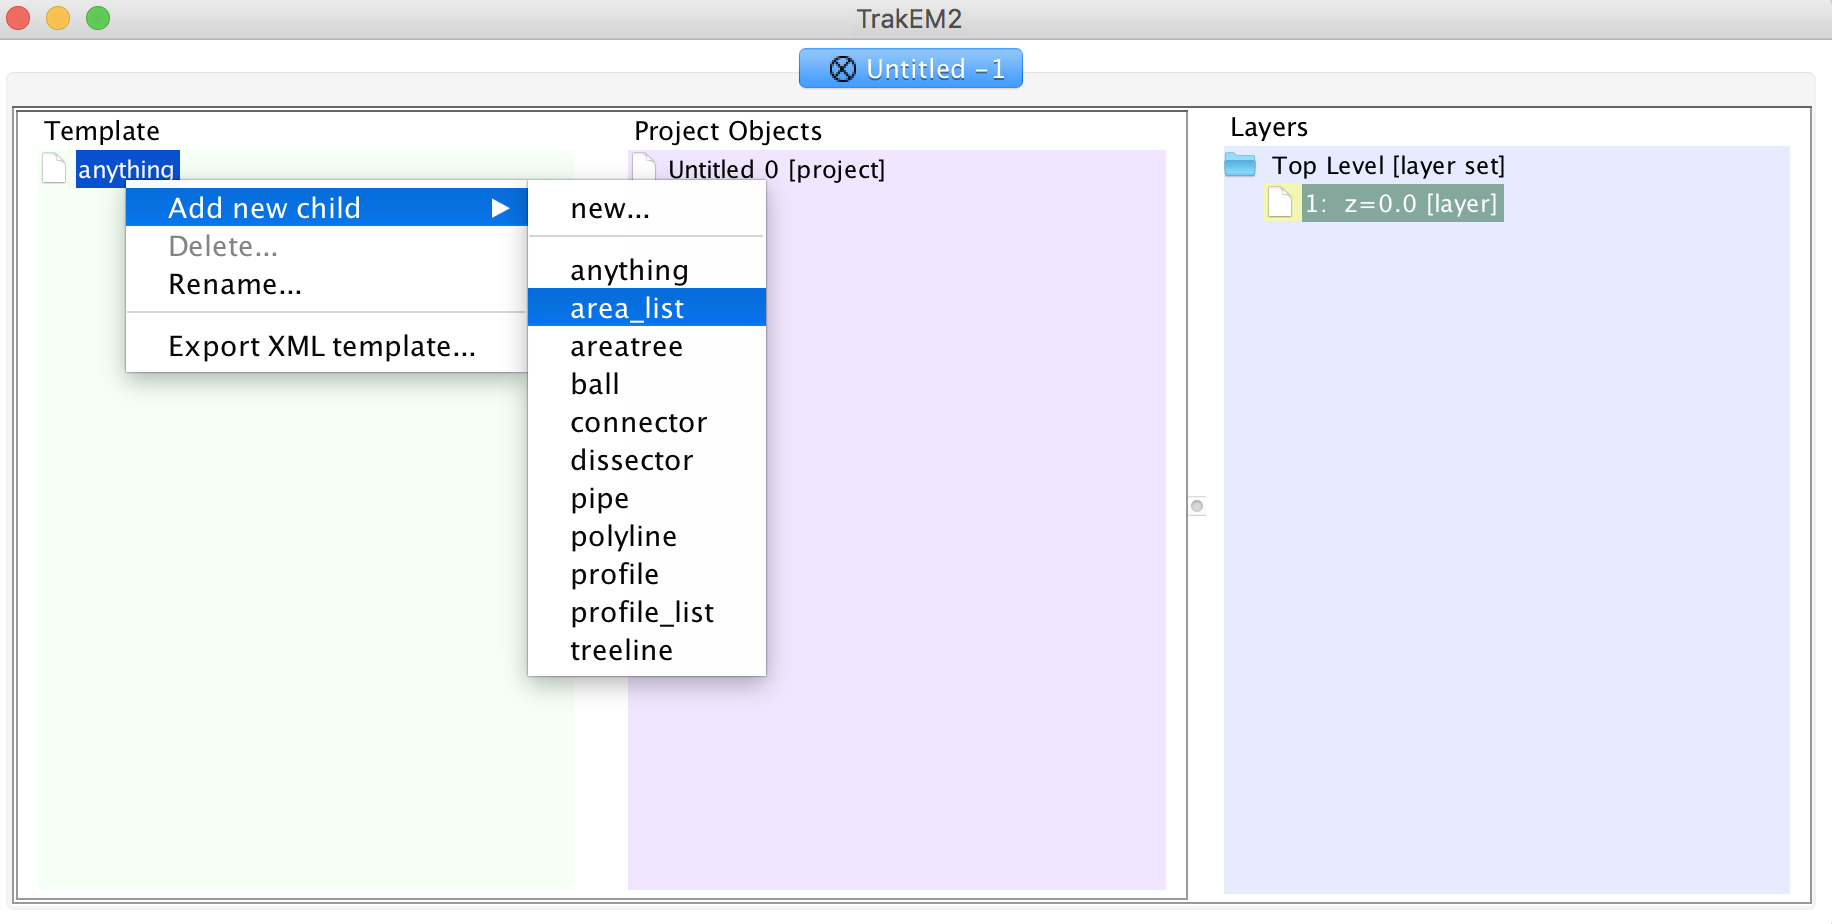
In your TrakEM2 properties, right click on "anything" in the template column and add a new "area_list".

-
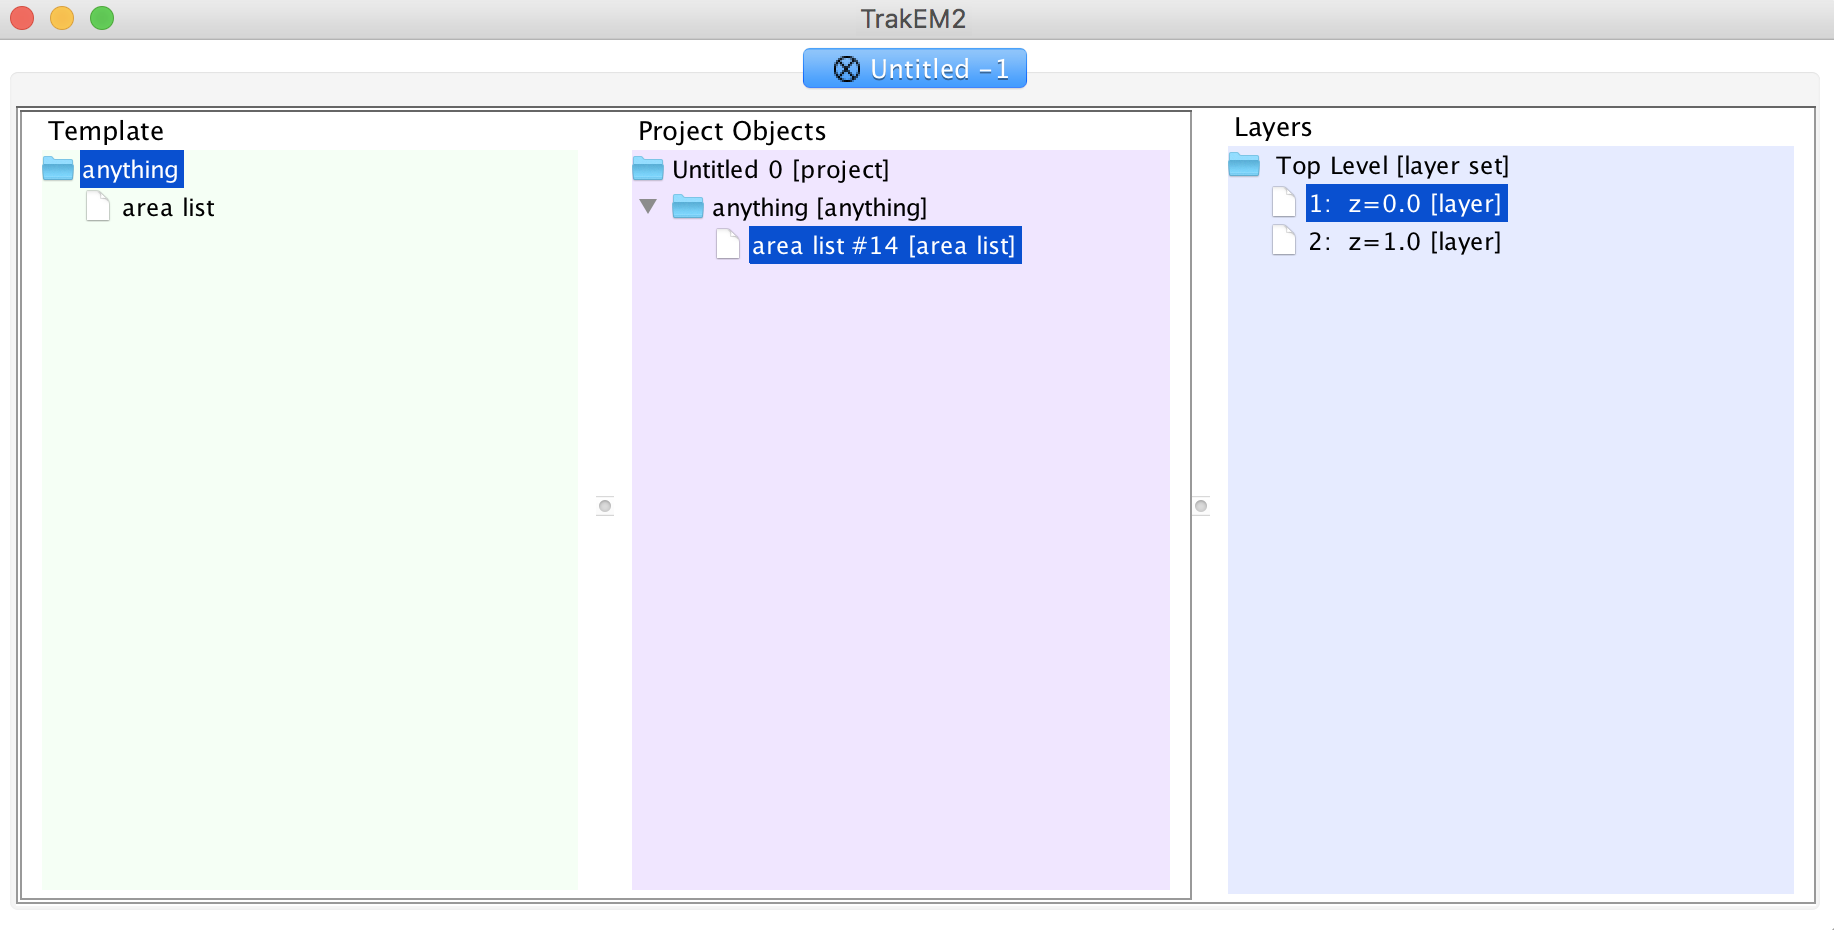
Drag the entire "anything" folder into "Unitled 0" in the middle column.
-
Right click the nested "anything" folder inside "Untitled 0" and add a "new area list".

-
Annotate Your Data by drawing all over it. You can scroll to annotate different slices in your tif. To add new unique annotations (with different IDs), redo steps
7and8. -
When done, right click your canvas and select "Export" -> "Arealists as labels (tif)".
NOTE: At any point, you can export your annotations as an xml by the same method listed above. Opening the xml file will start you where you left off.
-
A black screen will appear - these are your annotations, don't worry if you can't see them.
-
Save your annotations by choosing
Image Sequence..., selectingTIFF, selecting a name, and choosing the folder for output.
Questions/comments?
Email support@neurodata.io
